Published by Christopher J. Holley | Mopar History & Tech | January 2026
By examining what the filter captured, you can detect:
- Abnormal engine wear
- Early bearing or valvetrain failure
- Dirt ingestion (air filtration problems)
- Coolant contamination
- Oil breakdown or sludge formation
- Filter construction failures
Unlike oil analysis (lab testing), this method gives direct visual evidence.
Tools Required

- Dedicated oil filter cutter (preferred)
- Drain pan
- Nitrile gloves
- Strong magnet
- Razor blade or scissors
- White shop towels or coffee filters
- Good lighting / magnification
⚠️ Do not use a hacksaw—it introduces metal contamination that ruins results.
Step-by-Step Process
1. Drain the Filter
- Let the filter sit open-side down for 12–24 hours
- This prevents oil from masking debris
2. Cut the Filter Open
- Use the cutter around the base plate
- Avoid cutting through the media
- Remove the shell cleanly
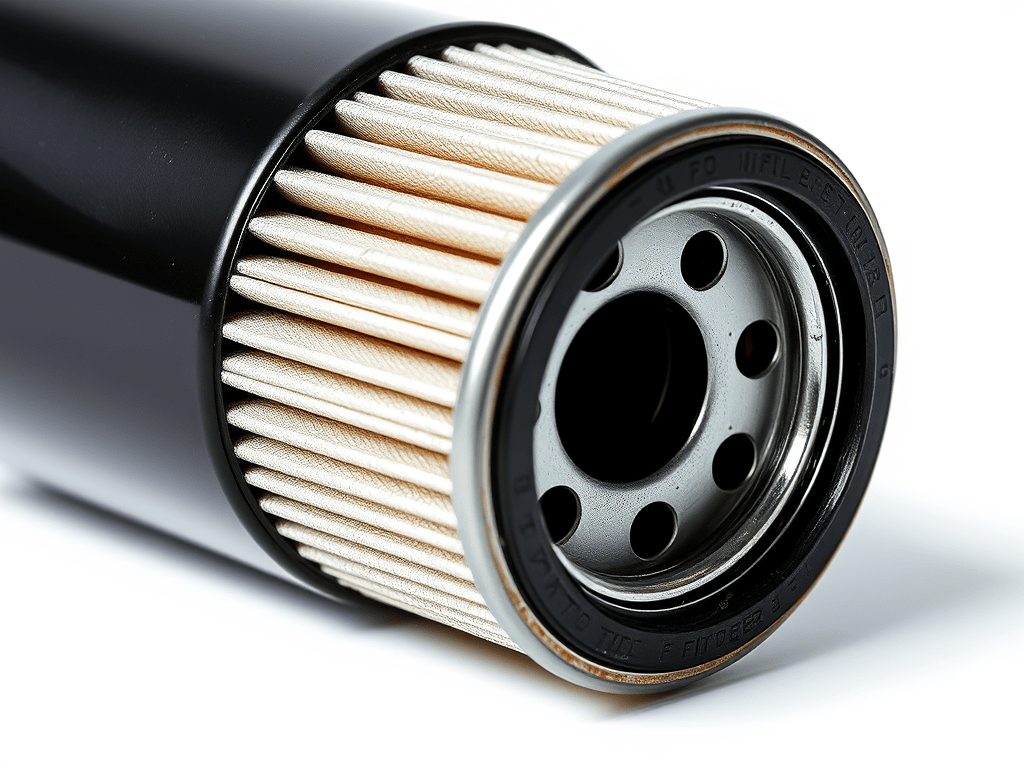
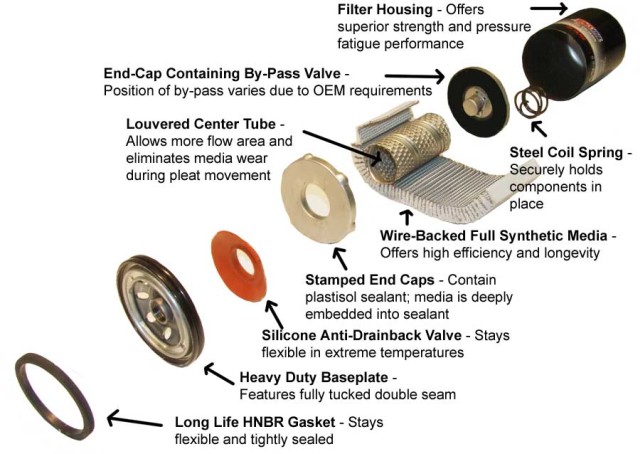
3. Remove the Filter Element
You’ll see:
- Filter media (pleated paper/synthetic)
- End caps
- Center tube
- Valves (bypass, anti-drainback)
Inspect these before touching debris.
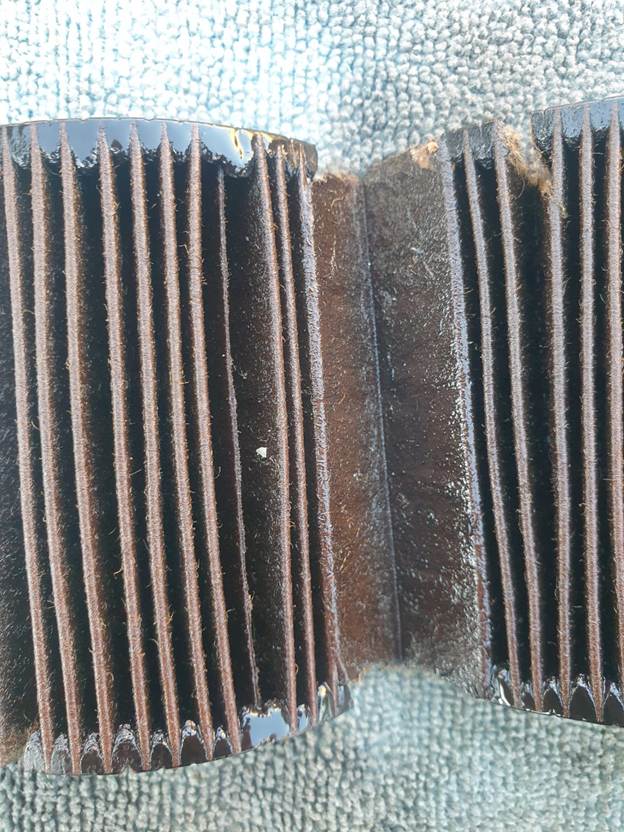
4. Inspect the Filter Media
- Carefully unfold or cut the pleats
- Lay flat on clean white towels
- Look for discoloration, debris patterns, or damage
5. Separate and Identify Debris
- Use a magnet to pull ferrous particles
- Inspect non-magnetic material visually
- Note particle size, color, and quantity
Interpreting What You Find (Most Important Part)
Normal Findings
- Very fine metallic “dust”
- Slight darkening of media
- Small carbon particles
This is typical break-in or normal wear.
Warning Signs & What They Mean
Shiny Metallic Flakes (Magnetic)
- Steel or iron
- Possible sources:
- Cam lobes
- Crankshaft
- Timing components
- Action: Monitor closely; repeat analysis next oil change
Copper / Bronze Glitter (Non-Magnetic)
- Bearing material
- Rod or main bearing wear
- Often precedes catastrophic failure
- Action: Immediate oil pressure check and oil analysis
Aluminum Particles
- Pistons
- Cylinder walls
- Turbocharger compressor housing
- Action: Compression test / borescope
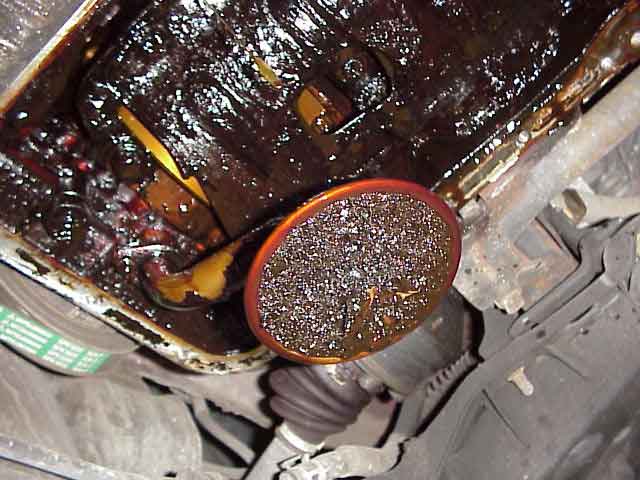
Black Sludge or Gel
- Oil oxidation
- Extended drain intervals
- Excessive heat
- Action: Shorten oil intervals, verify oil spec
Grit / Sand-Like Particles
- Dirt ingestion
- Poor air filtration or intake leak
- Action: Inspect air filter, ducting, seals
Milky or Tan Residue
- Coolant contamination
- Head gasket, oil cooler, or cracked block
- Action: Pressure test cooling system immediately
Inspecting Filter Construction Quality
Cut-open analysis also evaluates the filter itself.
Look for:
- Torn or collapsed media → inadequate strength
- Detached end caps → poor adhesive
- Deformed center tube → flow restriction
- Bypass valve stuck open → constant unfiltered oil
This is how many “cheap” filters get exposed.
Particle Size Matters
- <10 microns: Often normal wear
- 10–50 microns: Concerning if quantity increases
- >50 microns: Abnormal—mechanical damage likely
Larger particles indicate active component failure.
Frequency Recommendations
- Every oil change for race engines
- Every 2–3 oil changes for street vehicles
- After:
- Engine rebuilds
- Break-in periods
- Overheating events
- Oil contamination incidents
Cut-Open Analysis vs Oil Lab Analysis
| Cut-Open | Oil Lab |
| Visual, immediate | Chemical, quantitative |
| Detects large debris | Detects dissolved metals |
| No lab cost | Requires sample & time |
| Great for filter quality | Great for trend analysis |
Best practice: Use both together.
Common Mistakes to Avoid
- Cutting with a saw
- Not draining oil first
- Confusing filter media fibers for metal
- Ignoring non-magnetic debris
- Assuming “no debris” means “no wear”
Who Benefits Most
- Track / racing engines
- Turbocharged vehicles
- High-mileage engines
- Fleet maintenance
- Anyone chasing long engine life

Leave a comment